How to Make Hex Winding Checks with the J.D. Wagner Hex Punch
This tool was developed by Richard Tyree who demonstrated it at a rodmakers gathering in Greyling, Michigan. It was such a cool tool we asked for permission to make them, and Richard was gracious enough to give his blessing.
Using a hexagonal or square check is one of those nice touches that adds to all of the fine details that can make a rod exceptional. You can purchase preformed hex winding checks from CSE, or make your own. We make these tools for both hex and quad rods, and the beauty of them is you can make any size you want and not have to choose just 64th" increments.
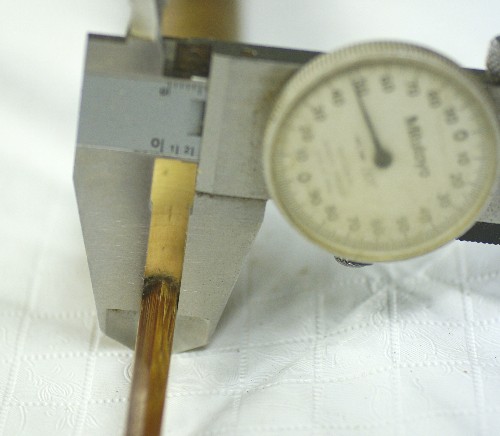
The first step is to select the appropriate winding check to form. You can use math, but I prefer to do it empirically. Just use a caliper to measure the 3 flats in front of the grip, choose the largest of the 3 and lock the jaws of the caliper.
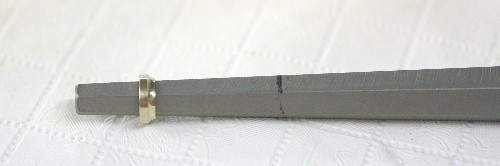
Next, slide the locked caliper up the punch until you get to the same dimension on the punch, and mark that spot on the punch with a fine tipped marker.
To choose the right sized winding check, just slide a check onto the punch. What you are looking for is a check that stops about 1/2"- 1" short of the mark you've made on the punch. Don't worry if you don't get it right the first time, as you'll still be able to form a check that you can set aside for a future rod.
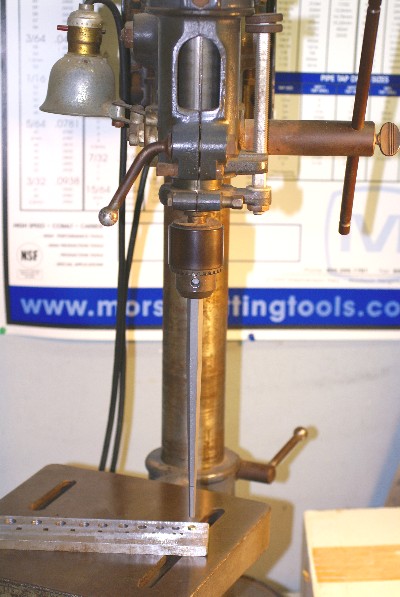
The next step is to form the check. You can just tap the punch while the check is supported by jaws of a vise, but I prefer to use the drill press and a metal plate drilled with various sized holes. This ensures the punch goes into the check straight and the check gets as much support as possible. The punch is checked up in the drill press...
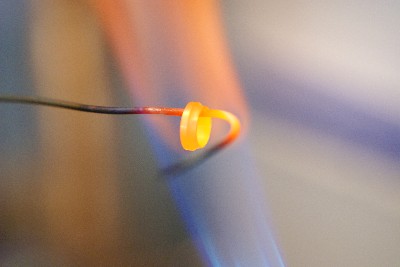
The checks seem to form a bit easier if they've been annealed first. I heat the check with a propane torch until it's cherry red and quickly quench it in water or oil. This will discolor the check and give it a layer of scale that will later be buffed out.
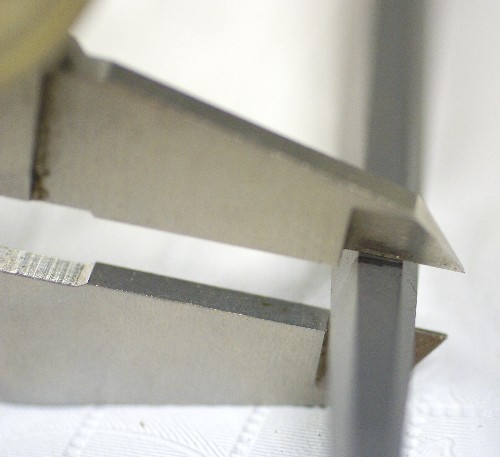
The check is then centered on the metal plate over a suitable hole. Obviously you want to choose a hole that will support the back side of the check..
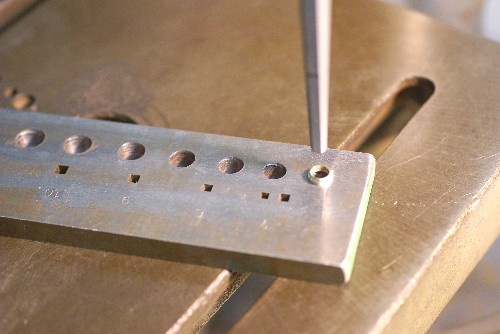
The punch is driven down towards the magic marker mark you made on the punch. Important: If you get to a point where the sides of the check are tight to the sides of the punch, but you have not yet reached the magic marker mark, stop! It might be tempting to go just a little further, but the metal of the check will reach its elastic limit and split. Better to finish off the check using the following steps and then try the next size up than ruin it by splitting it!

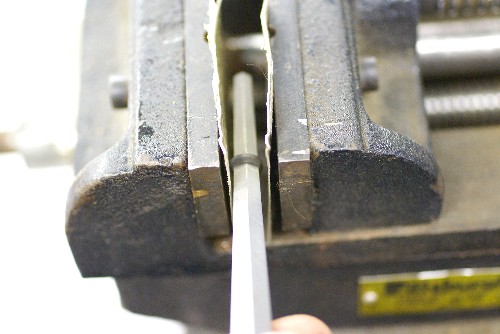
The next step is to form the sides and get the check off the punch. The sides are formed by gently squeezing all three flats of the punch and check in a vise. In order to avoid marring the check, you can line the chuck jaws with blocks of wood or a soft metal like aluminum. I use a couple sheets of nickel silver that are held to the chuck jaws with double-sided tape. Once the sides are formed the check will slide off the punch easily.
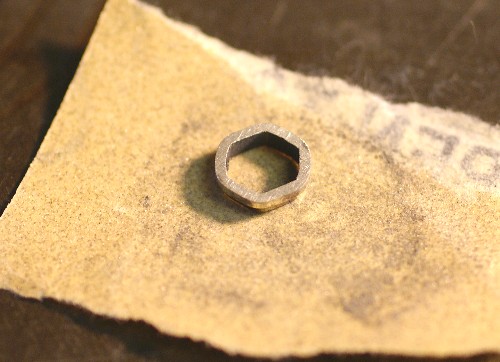
Here's the check, nicely formed.
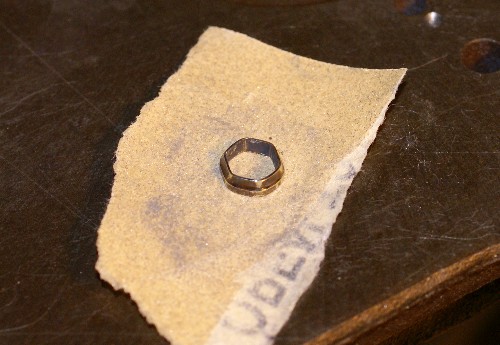
Sometimes the back of the check will deform or small burrs are present. Just rub the check against some 220 grit paper to flatten it.
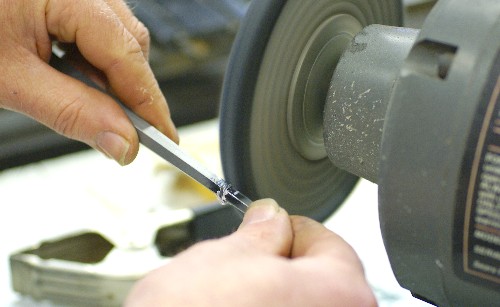
You can polish the check on a buffing wheel. Just mount the check back on the punch to hold it, apply a little Rolite polish and buff her up!
If you are going to blue the check, do so before it's mounted and then mount it to the grip. Use a toothpick to apply a minute amount of epoxy...nothing worse than a check with big gobs of sqeezed out glue! This process as outlined can seem pretty involved, but in practice it only takes about 5 minutes- a quick and easy way to dress up a rod!
Copyright 2011, J.D. Wagner, Inc.